Tuesday, June 25, 2013

Race Extravaganza

Now that summer is here and my computer is fixed, I am so excited to share this year's birthday party with all of you even if it was a few months ago. Camden is absolutely in love with Cars and most importantly Shiny Wax. So when it came to planning a birthday party this year, there was no doubt what it would be. Here are some of the amazing photos taken by my friend Cortney Heykoop, of Heykoopphotography. I am so glad she was able to come and capture this amazing day with our friends and family.

Here are some of the amazing photos. Thank you to Pinterest for the great ideas.

 I purchased several race themed items from racepartydecorations.com

  Race car apples and grapes.
 
 Cone cups thanks to birthdayexpress.com
 
 This wall masterpiece was thanks to my wonderful husband and step-dad. Didn't they do a great job?
 
The cake that looked easier to create than it actually was.
 
 My mom's amazing sugar cookies.
 
The stop light cupcakes that were oh so yummy too!
 

Camden's favorite car in the movie or should I say not in the movie is Shiny Wax. I think it could be his color but I found some great clip art online and printed it on sticky paper. Worked great to jazz up the applesauce.
The pit passes that the kids each were given.
 
Our little photo booth that I created with help from my family. All of our guests were able to get their pictures taken in the photo booth. It was a great memento for us and them to remember the day.
 
 
Some more great photos of the day.
 
 
I created my stop lights with soda cases. Amazing what I little spray paint and colored circles can do.
 
Great birthday shirt purchased from http://www.etsy.com/shop/AChapmanCreations
 
Dad and I had some fun with the photo props.
It was a great day and I can't wait to plan the next party.
 
Michelle :)


Thursday, March 28, 2013

Rendi-licious

This past November I attended a vendor event at my friend Laura's house. As I was meandering through her house I came upon some fantastic frames and home décor. I started to talk to the consultant and left with the intention of having my own catalog party. Once I came home and had more time to rifle through the catalog, I realized this was just what I needed to fulfill a part of myself and fill my walls. What is this fabulous company you might ask?? RENDI!

Rendi is this fun new company that helps you take a few of those photos, combine them with words, like a quote or an expression, and turn them into customizable frames and signs. You use them to give your walls a personality and show off the people who have filled your life with love and laughter.  Rendi makes it easy to update your walls or create a perfect gift. It all starts with just one picture of a best friend or a photo of your son or daughter.
 

~Use Rendi to promote your business~ 

R5107
 
R5101
 

~In your classroom, office, or school.~


R5107 and R5104
 

~To celebrate a special person or event~

R3046
R3043
 

~Or to tell your family story~

This is where ours began....
 
R5601
 
I can't wait to help you tell your story.
 
Click on the links below to visit my website and Facebook fan page to see some pictures of the amazing things you can Rendi. I know you will love it just as much as I do.

www.makeitpersonal.rendistyle.com

 Pinability Fan Page

 
Michelle :)
 

Wednesday, March 27, 2013

Party Time

Each year, I try to create the best birthday party I can for my son Camden. I figure I can never get these precious days back so why not go out with a bang. I guess you could say I like planning parties too. For his first birthday, the theme was, The Hungry Caterpillar. We had two parties, one in PA and one in MD for all of our family and friends. The first pictures are from our church social hall in Pennsylvania.

 This is a picture of the birthday sign I created. I have never cut out so many circles in my life.


These cakes and cupcakes were created at Giant in Meadville, PA and were super delicious!

 My mom made her famous sugar cookies.


I created our own caterpillar with red and green balloons.


 I also created a caterpillar photo timeline of Camden's first year.
 
 
I purchased a personalized t-shirt on etsy.
 
 I also made a highchair sign that was made to look like The Hungry Caterpillar.
 

Each child received a cute visor that I made with red foam visors from Michael's. I just added eyes and a nose.

The second party was a little easier because it was at a local restaurant and I was able to use many of the decorations for a second time. The table cloths I was able to purchase at Target which was great! I had plates and placemats that matched each jelly bean color on each table as centerpieces.


Guests were asked to sign a copy of Eric Carle's book, The Hungry Caterpillar as a keepsake for Camden. My mom and I created the cake and the cupcakes after I had ordered one from a local grocery store that did not look pleasing at all! I think we did a great job!


Yes, I sorted all of those Jelly Belly jelly beans too! I am a little OCD when it comes to party planning.


Last year, for Camden's second birthday our theme was Elmo and Sesame Street. I found so many great ideas on the internet. Below are just a few photos from the party.

My friend Bobbi created this Elmo out of baby tomatoes, black olives, and carrots.

 
My mom and I created the cake and the cupcakes. I purchased the cake pan and the candy eyes at JoAnn's, with my coupons of course. 


The tradition continued with guests signing a book with the party theme so that Camden would have another keepsake as he grows up.


The goody bags had crayons and gold fish in them of course. I also wanted something personal and educational that the kids could have so I created shakers. The shakers you see in the background have colored rice in them. There are also letters in each one that spelled the child's name. The tags were color coordinated with the beads inside so the kids knew what color beads to look for. They were a big hit. I had to drink a lot of orange juice and dye a lot of rice but it was well worth it. 


One of the things that I saw online and knew that I had to create were these adorable character heads out of tissue paper. Once I created the faces out of cardstock, the rest was easy.  I think I used about 8-12 sheets of tissue paper in each color.


My husband and I created this great Camden Street sign after seeing a similar one online. Ryan, my husband wanted ours to actually work so he used an led light under the globe that turns on and off. Camden and all of his guests had a great time.
 
 
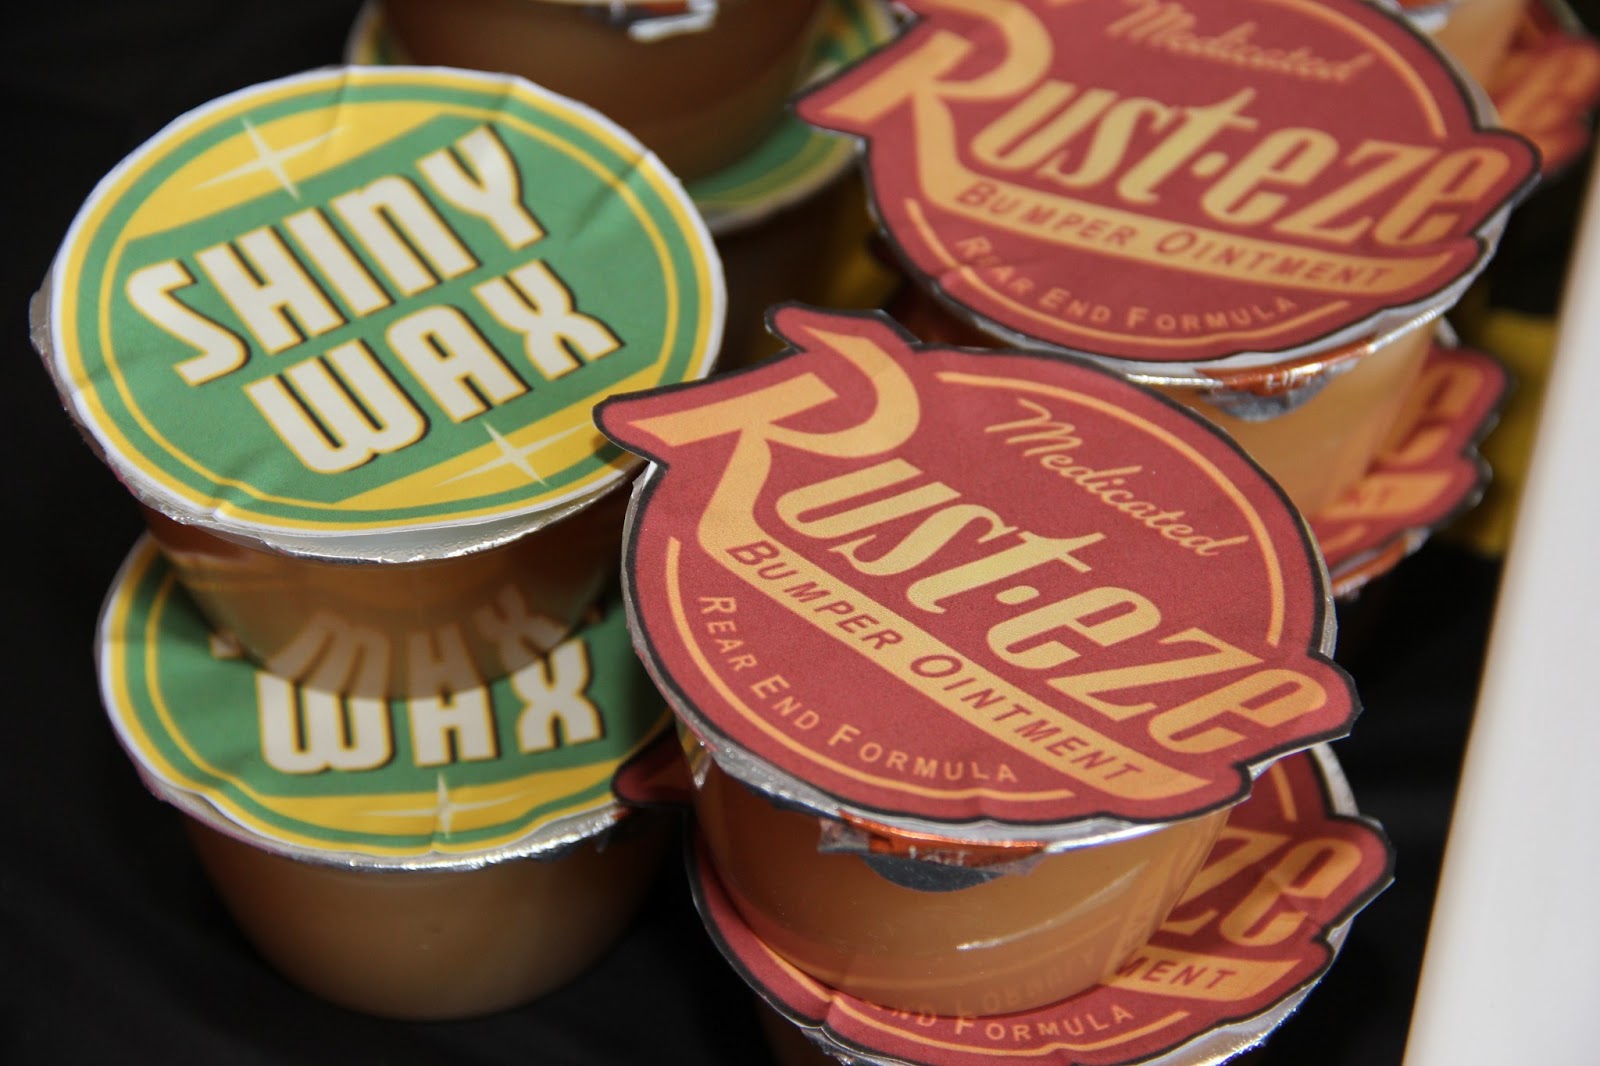
I know Camden is looking forward to his Cars party this year as am I. Stay tuned, the party planning has commenced....
 
Michelle :)

Thursday, February 14, 2013

Valentine's Day handouts

This year I had prepared well in advance for my class valentines. I had the perfect idea...well until I lost part of my idea in a pile of mail. I still think they turned out cute but I know they could've been so much more. Ha!!! What is missing are the cute inch worms that I purchased to go on the pencils. Oh well....I don't think the kids will know what they are missing.

I purchased rulers, eraser grippers, and pencils all from the dollar store.
The rulers came in a 3 pack for $1.00 so I was able to keep the cost down.
10 eraser grips for $1.00
 
I purchased the pencils at Wal-Mart 12 for $0.97
I created a sheet of tags in Microsoft Word. I was able to fit 6 on a sheet. The clip art I used is from www.thistlegirldesigns.com where I have a lifetime membership.
 
Here is the final product. They were a big hit today!! 
 
What fun valentine crafts did you make at your house this year?